Knowing how to mount your own rifle scope can quite literally mean the difference between making the shot of a lifetime or missing. No, that isn't an exaggeration.
I was someone that for a long time was intimated by mounting my own rifle scope and having the confidence that it will perform properly when it matters most. But I wanted to learn how to do it myself, and I wanted to create an easy to use guide so anyone could do it.
I wanted this article and our accompanying video to cover everything you need to know to mount your own scope, and while there are a number of different ways to mount a rifle scope, this methodology will work for mounting a rifle scope on nearly any hunting rifle.
After reading this article and watching our video below, you will have the confidence and knowledge to mount your own scope like the pros (or your money back).
You might be wondering:
"Why should I mount my own scope? I can just pay a few bucks to have the guys at my gun shop do it, or get it done there for free."
The simple answer is your scope mounted by someone else was likely mounted improperly. Many gun experts will tell you that mounting your own rifle scope properly is the #1 thing you can do to improve the performance of your rifle. No doubt there are many fine people in gun shops that do a great job mounting rifle scopes, but there are a lot of rifle scopes that aren't mounted with precision, which can cause any number of problems when you're sending bullets down range.
Just think about it: A guy that is putting a scope on a rifle that isn't his, that has other customers to deal with, and is thinking about what he needs to get done after work, is prone to making errors or rushing things. The same principal applies to someone building a house that isn't theirs, or working on your car instead of theirs. It is human nature thing.
By having a properly mounted scope, if a gun isn't shooting like you think it should, knowing your scope is properly mounted allows you to focus on diagnosing the problem elsewhere.
Fun Fact: The folks at Vortex Optics relayed to me the overwhelming majority of complaints about rifles scopes not shooting properly is due to improper scope mounting. Go ahead and read that last sentence again, because it is important and demonstrates why mounting your own scope is worth your time.
A Kimber Mountain Ascent 30-06 with the Vortex LH-HD 3-15x mounted using a Tally lightweight ring/base combo.
Step By Step Process for Mounting a Rifle Scope
Step #1: get the right tools. Don't skip this step (seriously):
Torque wrench-Borrow one, buy one or don't mount your own scope (more on why later). This is a key piece of equipment you can't do without.
Leveling kit-There are a number of different leveling systems out there. I used the Wheeler Engineering Professional Leveling kit ($64). You do not need to buy this particular leveling kit, but what I liked about this kit was both its accuracy and how universal it is. You can use it on nearly any caliber of gun no matter how you mount your scope and with whatever scope mounting hardware you want.
Gun stabilizer-Notice I didn't say gun vice. A gun vice of some type is ideal, but what you really need is a way to stabilize your gun and this can be accomplished in a number of ways. A set of bipods with a solid rest for your stock using sand bags can also work. As as a last resort, you can also set up something custom, like a couple of 2x4 chunks connected together (you'll have to get creative with this one).
Step #2: Pick Your Scope Mounting Hardware
There are several different types of "mounts" for your riflescope. The vast majority of scope mounts will be done using:
A scope ring and base setup.This is the most basic and common setup you see on hunting rifles. This mounting hardware involves a "base" piece and a scope ring that screws into the base. The Talley base/ring lightweight alloy mount is a variation of the classic base/ring setup, where the bottom half of the scope rings and bases are one piece instead of two separate pieces. This setup is the lightest and perhaps the most common setup you can get. For lightweight and backpack hunting aficionados, this is the setup that is often preferred as it only ads a couple ounces to your setup (this is the base/ring setup I use most of the time).
A rail and scope ring setup. This setup involves using a single rail such as a picatinny rail that mounts into your gun barrel (your "base"), and then attaching scope rings to the rail. This setup is preferred by tactical and long range shooters because it ensures your one-piece scope rail is mounted on the same plane, and therefore your scope rings will also be mounted on the same plane, which in theory ensures your scope rings are perfectly aligned and not torquing your scope at different angles. You also get more adjustability and can choose where to place your rings on the rail to move your scope around more. The downside? Weight. You'll add a few ounces if you are using a rail, but there are some great lightweight rails for as little as 2 ounces.
The other advantage with this setup is it is slightly easier to level your rifle scope. It will make sense why further down, but having the rail makes setting your reference level very easy.
However you mount your scope, be sure to buy scope rings that are sized properly for your scope (i.e. 30mm or 1").
This Kimber Montana with the Razor HD LH 3-15x is going to be a lightweight mule deer slayer
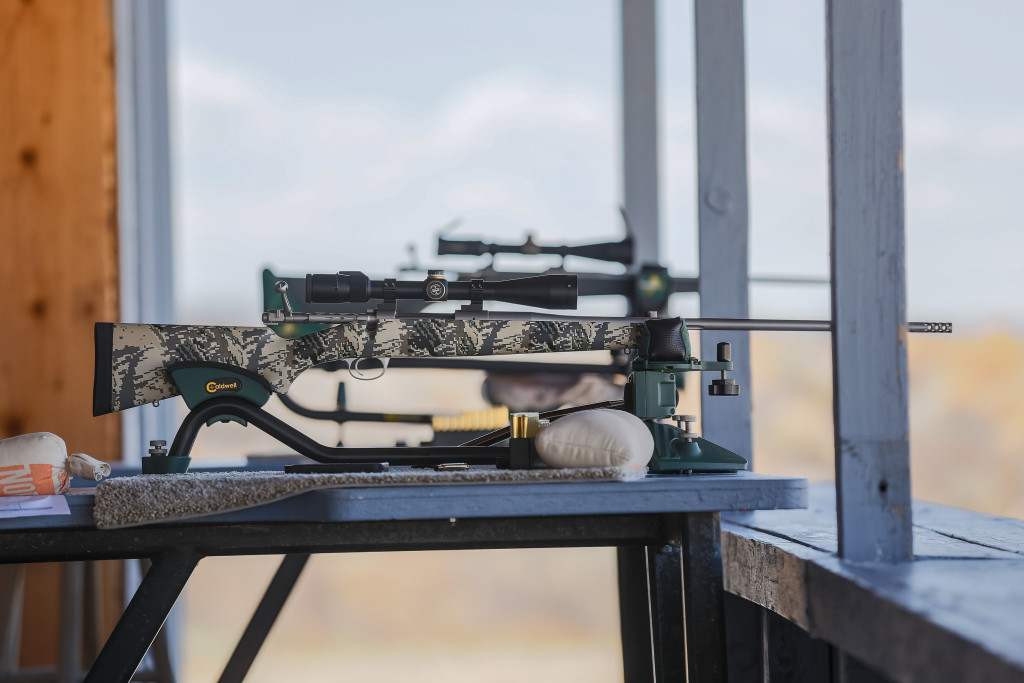
Step #3: Stabilize your gun
This is where you either put your gun in a gun vice, a bench vice with some aftermarket rubber arms, or rig up some sort of home made contraption that will keep your gun stable. If you are not going to use a vice of some sort, make sure whatever you use to stabilize your gun will keep the gun stable even while you are messing with the scope.
You want your gun to be roughly parallel to the ground as well.
Step #4: Mount your bases or the bottom piece/half of your rings
If you are using a rail, like a picatinny rail: put a very light coating of oil on the underside of your rail before you mount it (to prevent corrosion), being sure not to get oil on the mounting screws. Apply Blue Loctite to the base screws if you like, and torque the screws using the manufacturers specifications with your torque wrench.
If you are using a base/ring combo: Follow the same steps as above, but only mount the lower half of your ring/base combo so you have the horizontal part of your bases to set your reference level on.
An important note if you are using a base/ring combo:
Some people will tell you using the base ring setup is more likely to result in your scope rings mounting at a slightly different angles, which can cause scope torquing issues, and therefore cause scope malfunction.
This is why some people do what is called "lapping", which is a process that is designed to ensure your rings don't torque your scope and involves a medieval looking tool. It is popular opinion that you should always lap your rings. However, Tally (as well as most other high end precision scope ring manufacturers) recommends not lapping their rings since they are precision made rings. Further, many people that use high quality rings without lapping never have problems. My take on lapping is if you buy a quality set of rings, you shouldn't need to lap them. Heresy, I know.
Step #5: Level your rifle scope
When I first started mounting my own scopes figuring out exactly how to level a scope was confusing as there are a number of ways to level your rifle scope. It really isn't hard, but there are many, many strong opinions in the world on "how to do it right" that sometimes contradict each other. There are also different methods and techniques depending on what hardware you use to mount your rifle scope. Some people will say using a plumb line to align your crosshairs is the only way, and others will say a good bubble level is plenty accurate. I've always used a high quality set of levels and have not had issues. Take that for what it is worth.
What you are doing by leveling your scope is trying to make sure the rifle scope is on the same horizontal plane as the action of your gun. That's important because if your scope is rotated even a couple of degrees left or right, when you put your cross-hairs on a target and your scope is not perfectly level, your gun barrel is actually canted right or left and you are aiming slightly left or right, but you won't know it.
That last part is hard to visualize and wrap your head around without a visual demonstration, but the takeaway is you want your scope to be level or your rifle won't be as accurate as it could or should be.
Rather than go through all the ways you can level your rifle scope, I'm going to explain the easiest way I found to level a riflescope that will work for any scope and any gun no matter what hardware you use or how big your action is.
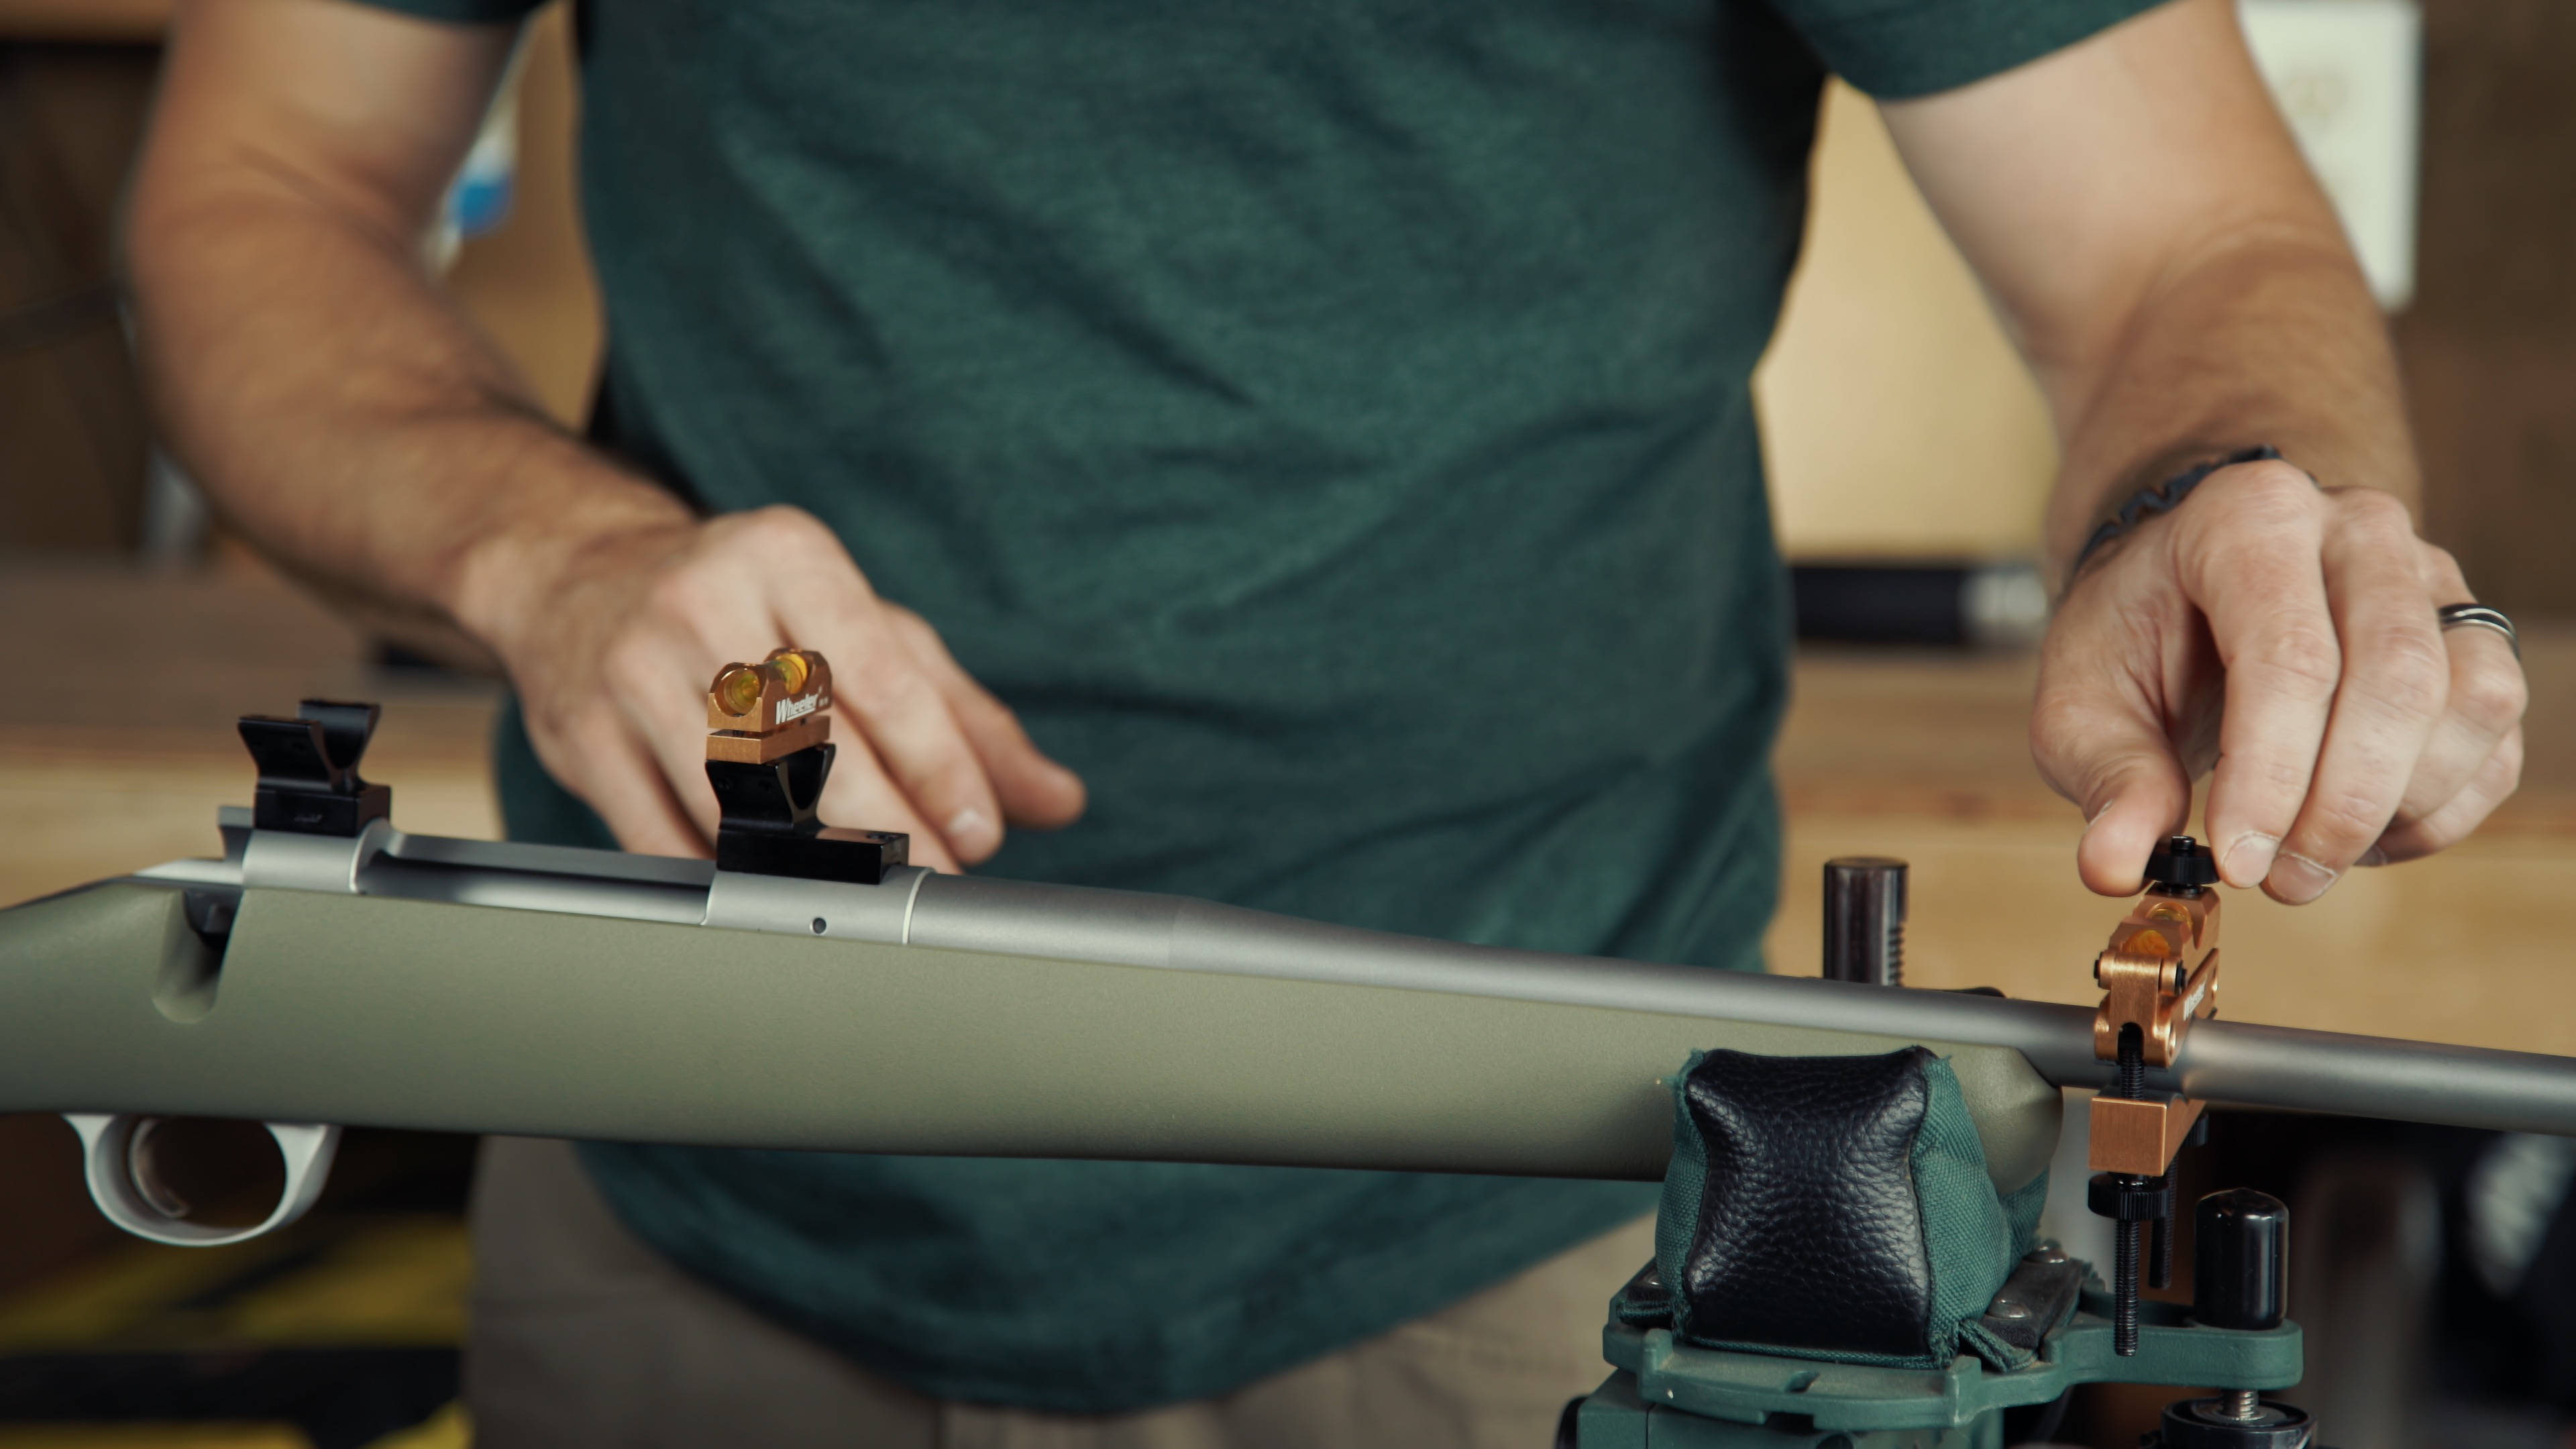
I bought a few different leveling kits, but the Wheeler Engineering Professional Leveling kit is the best I have found. This kit comes with a barrel clamp level and a second small reference level.
Here's how you level your scope:
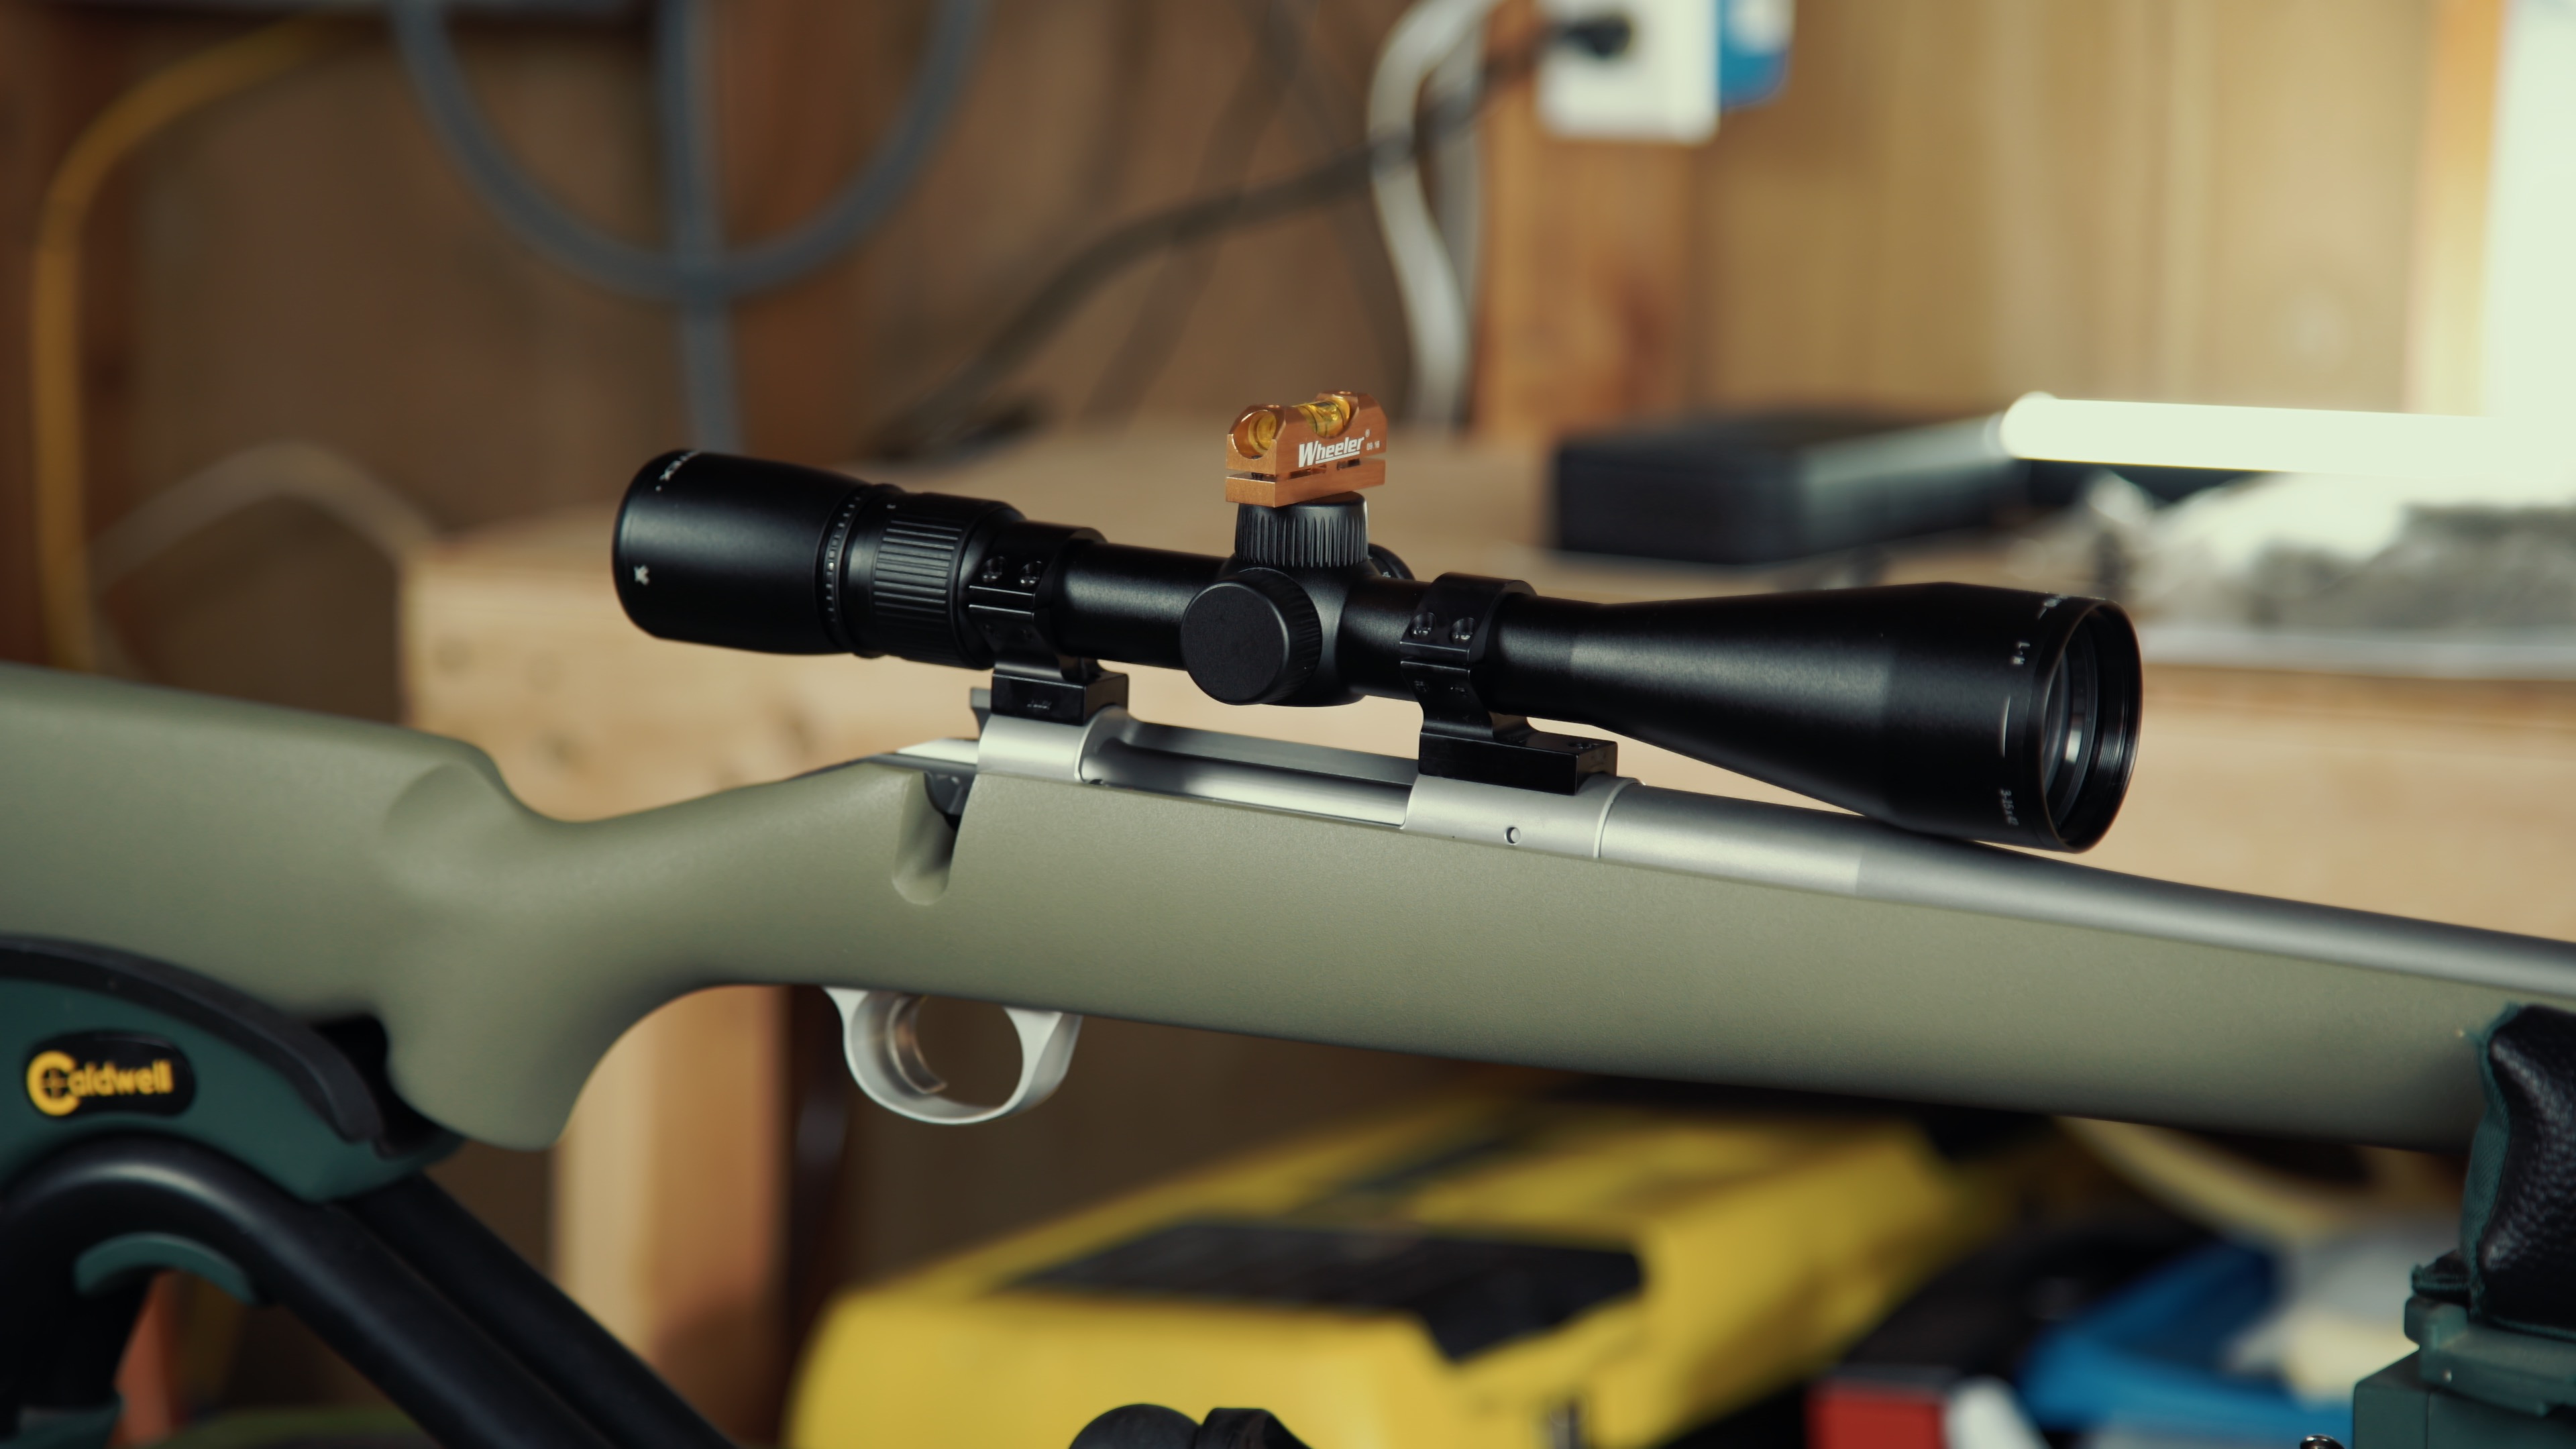
Mounting your index level
Place the barrel clamp level on the barrel of your gun and get it approximately level with the action of your rifle. Tighten it down well. At this point you are simply attaching the level, but are not worried about leveling it at this point.
Place the smaller reference level on your rail or base mounts, or the bottom half of your scope rings. Important: Make sure the reference level is perpendicular to your barrel. To perform this step you will obviously need to mount your rail or your bases and the bottom half of your scope rings to manufacturers torque specs.
Adjust your rifle left or right until the reference level on your rail or rings is level, with the bubble between the two lines.
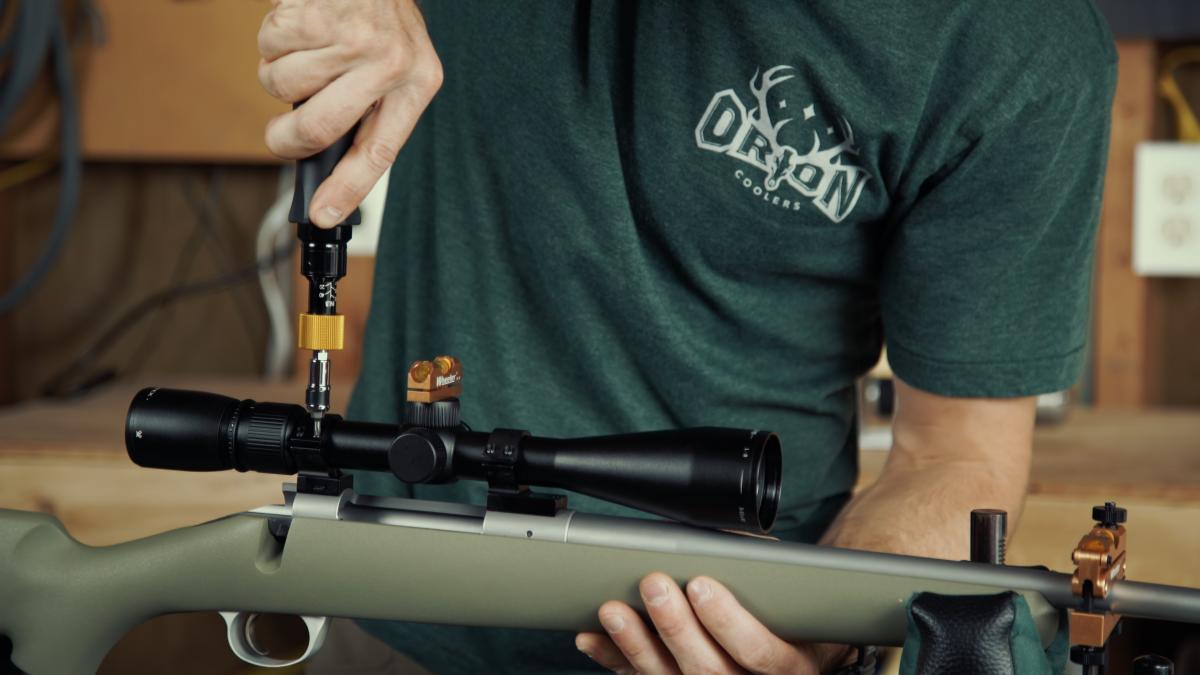
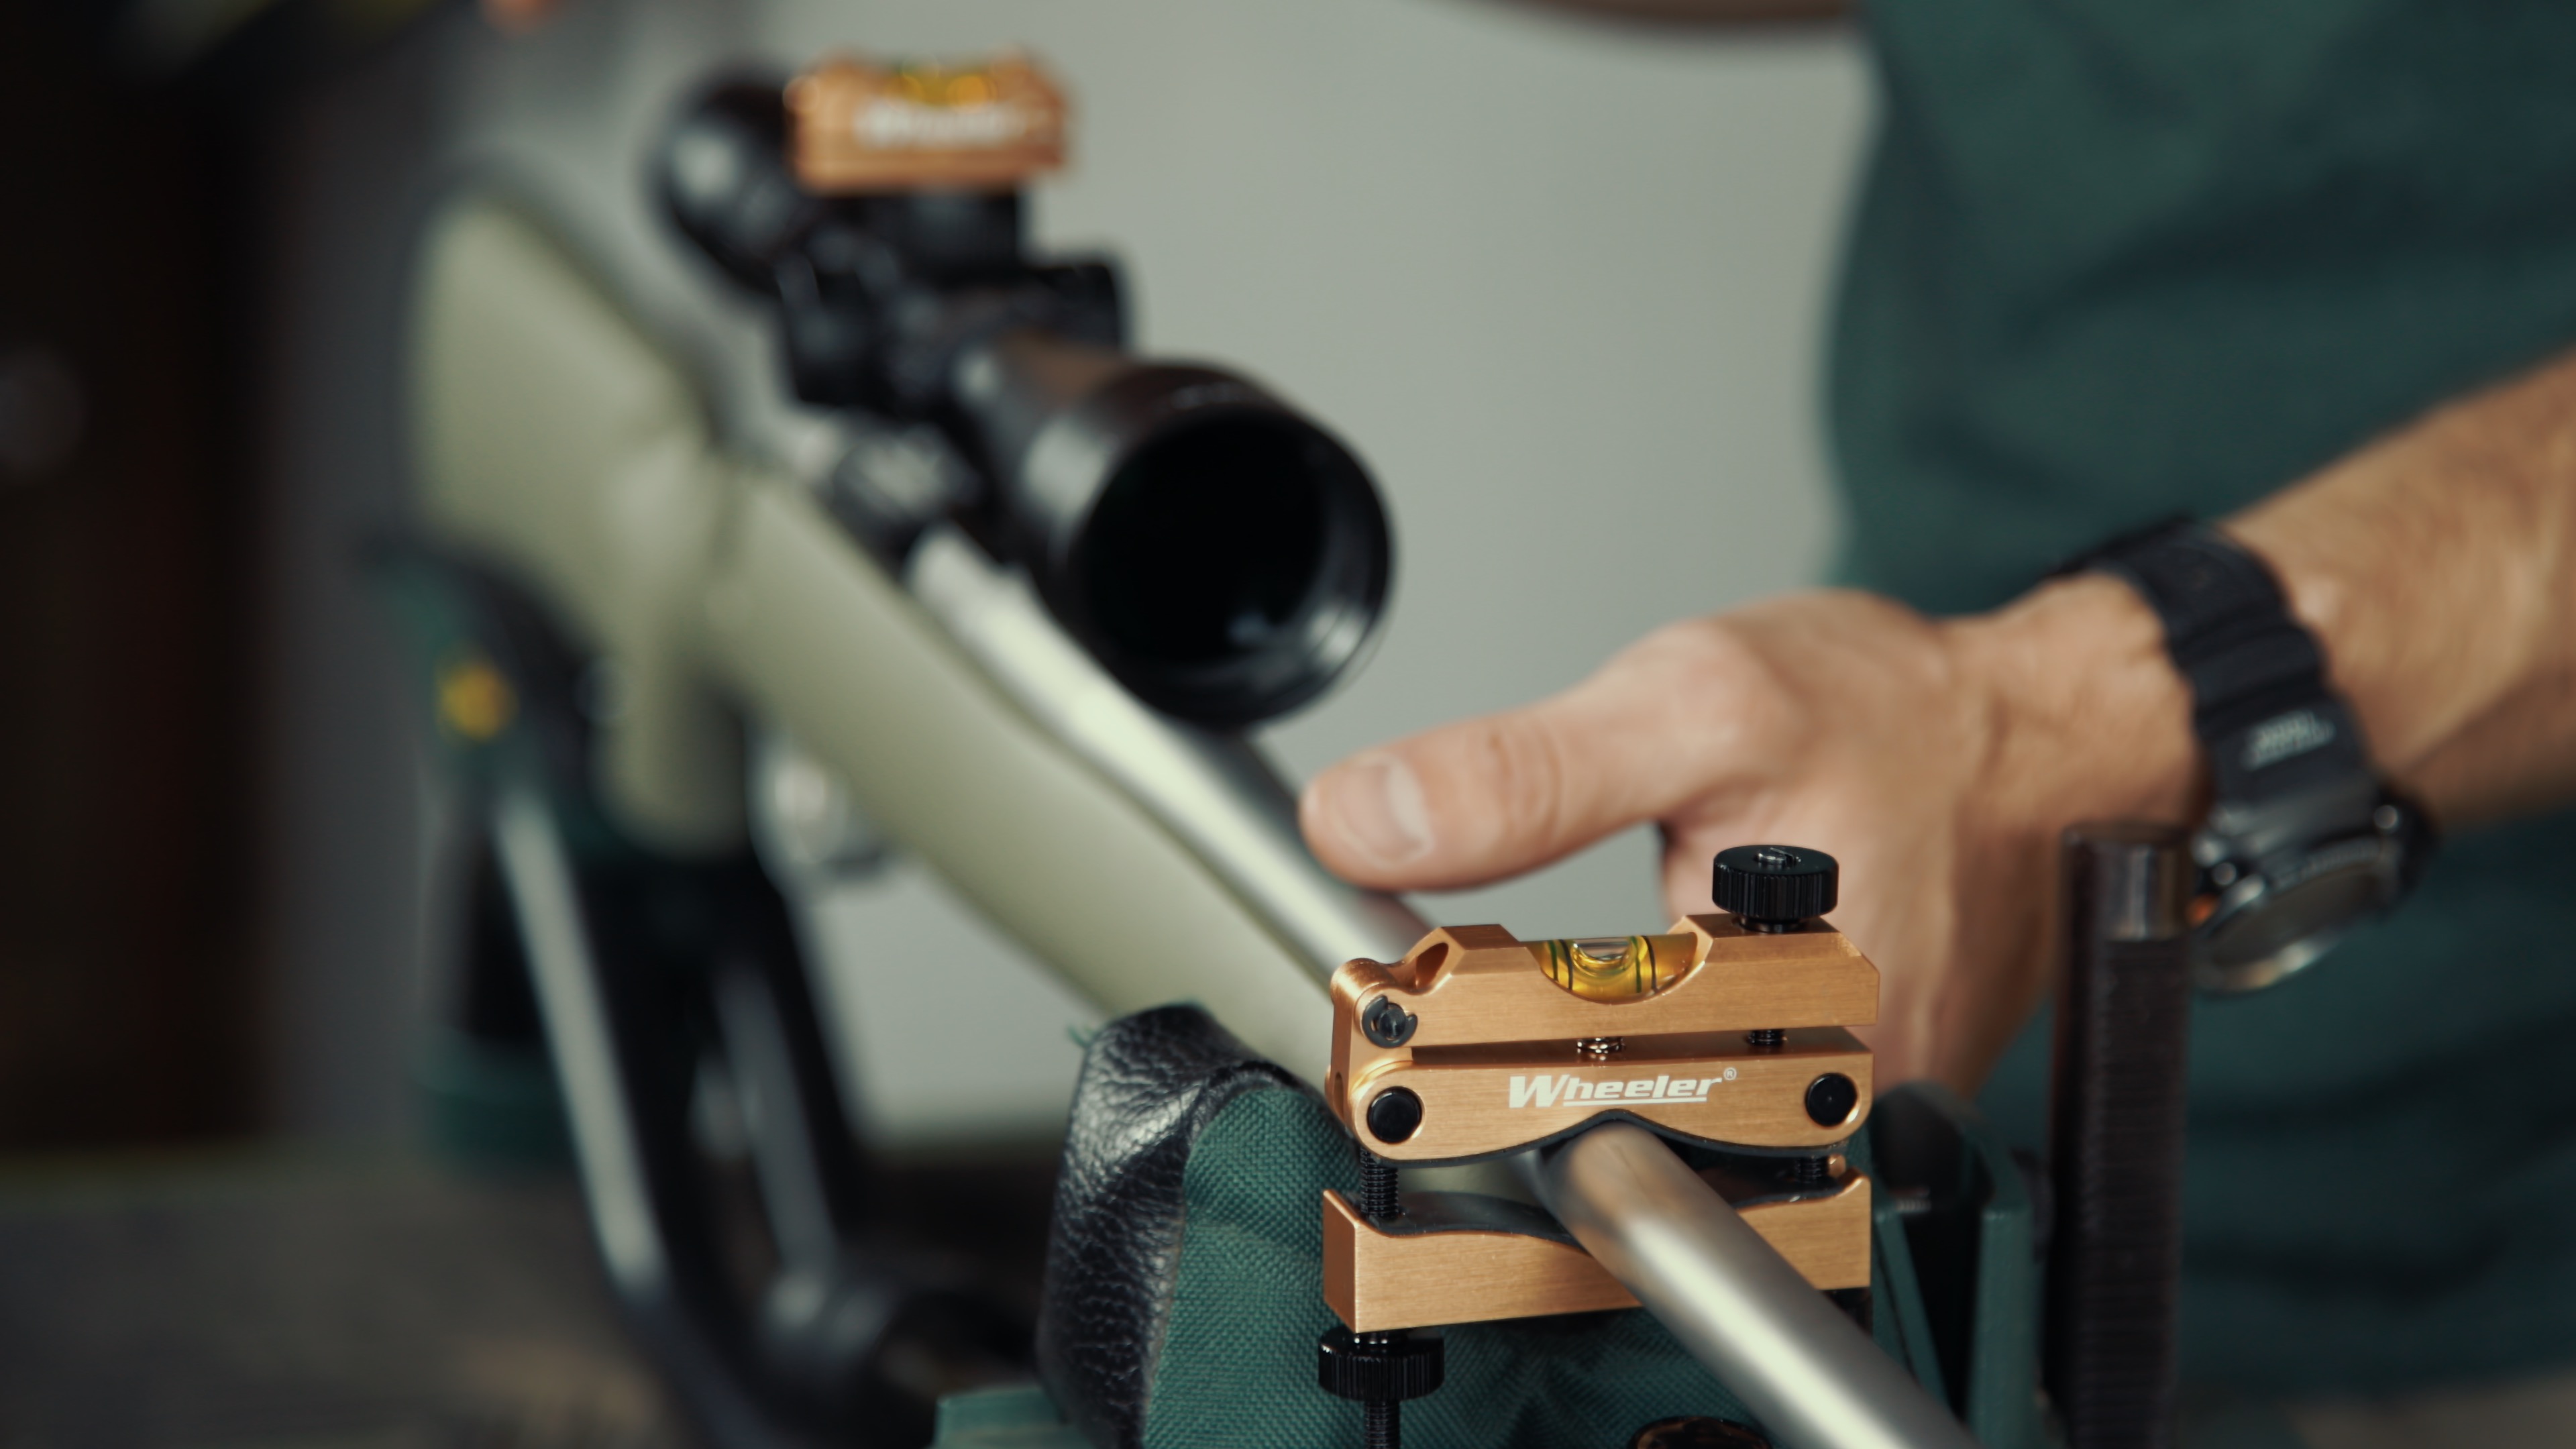
Next, adjust the barrel clamp level using the micro adjuster to match the small reference level. Once your barrel clamp level matches the bubble on your reference level, your barrel clamp level is officially "indexed" to your rifle. Be sure not to bump the barrel clamp level once it is indexed.
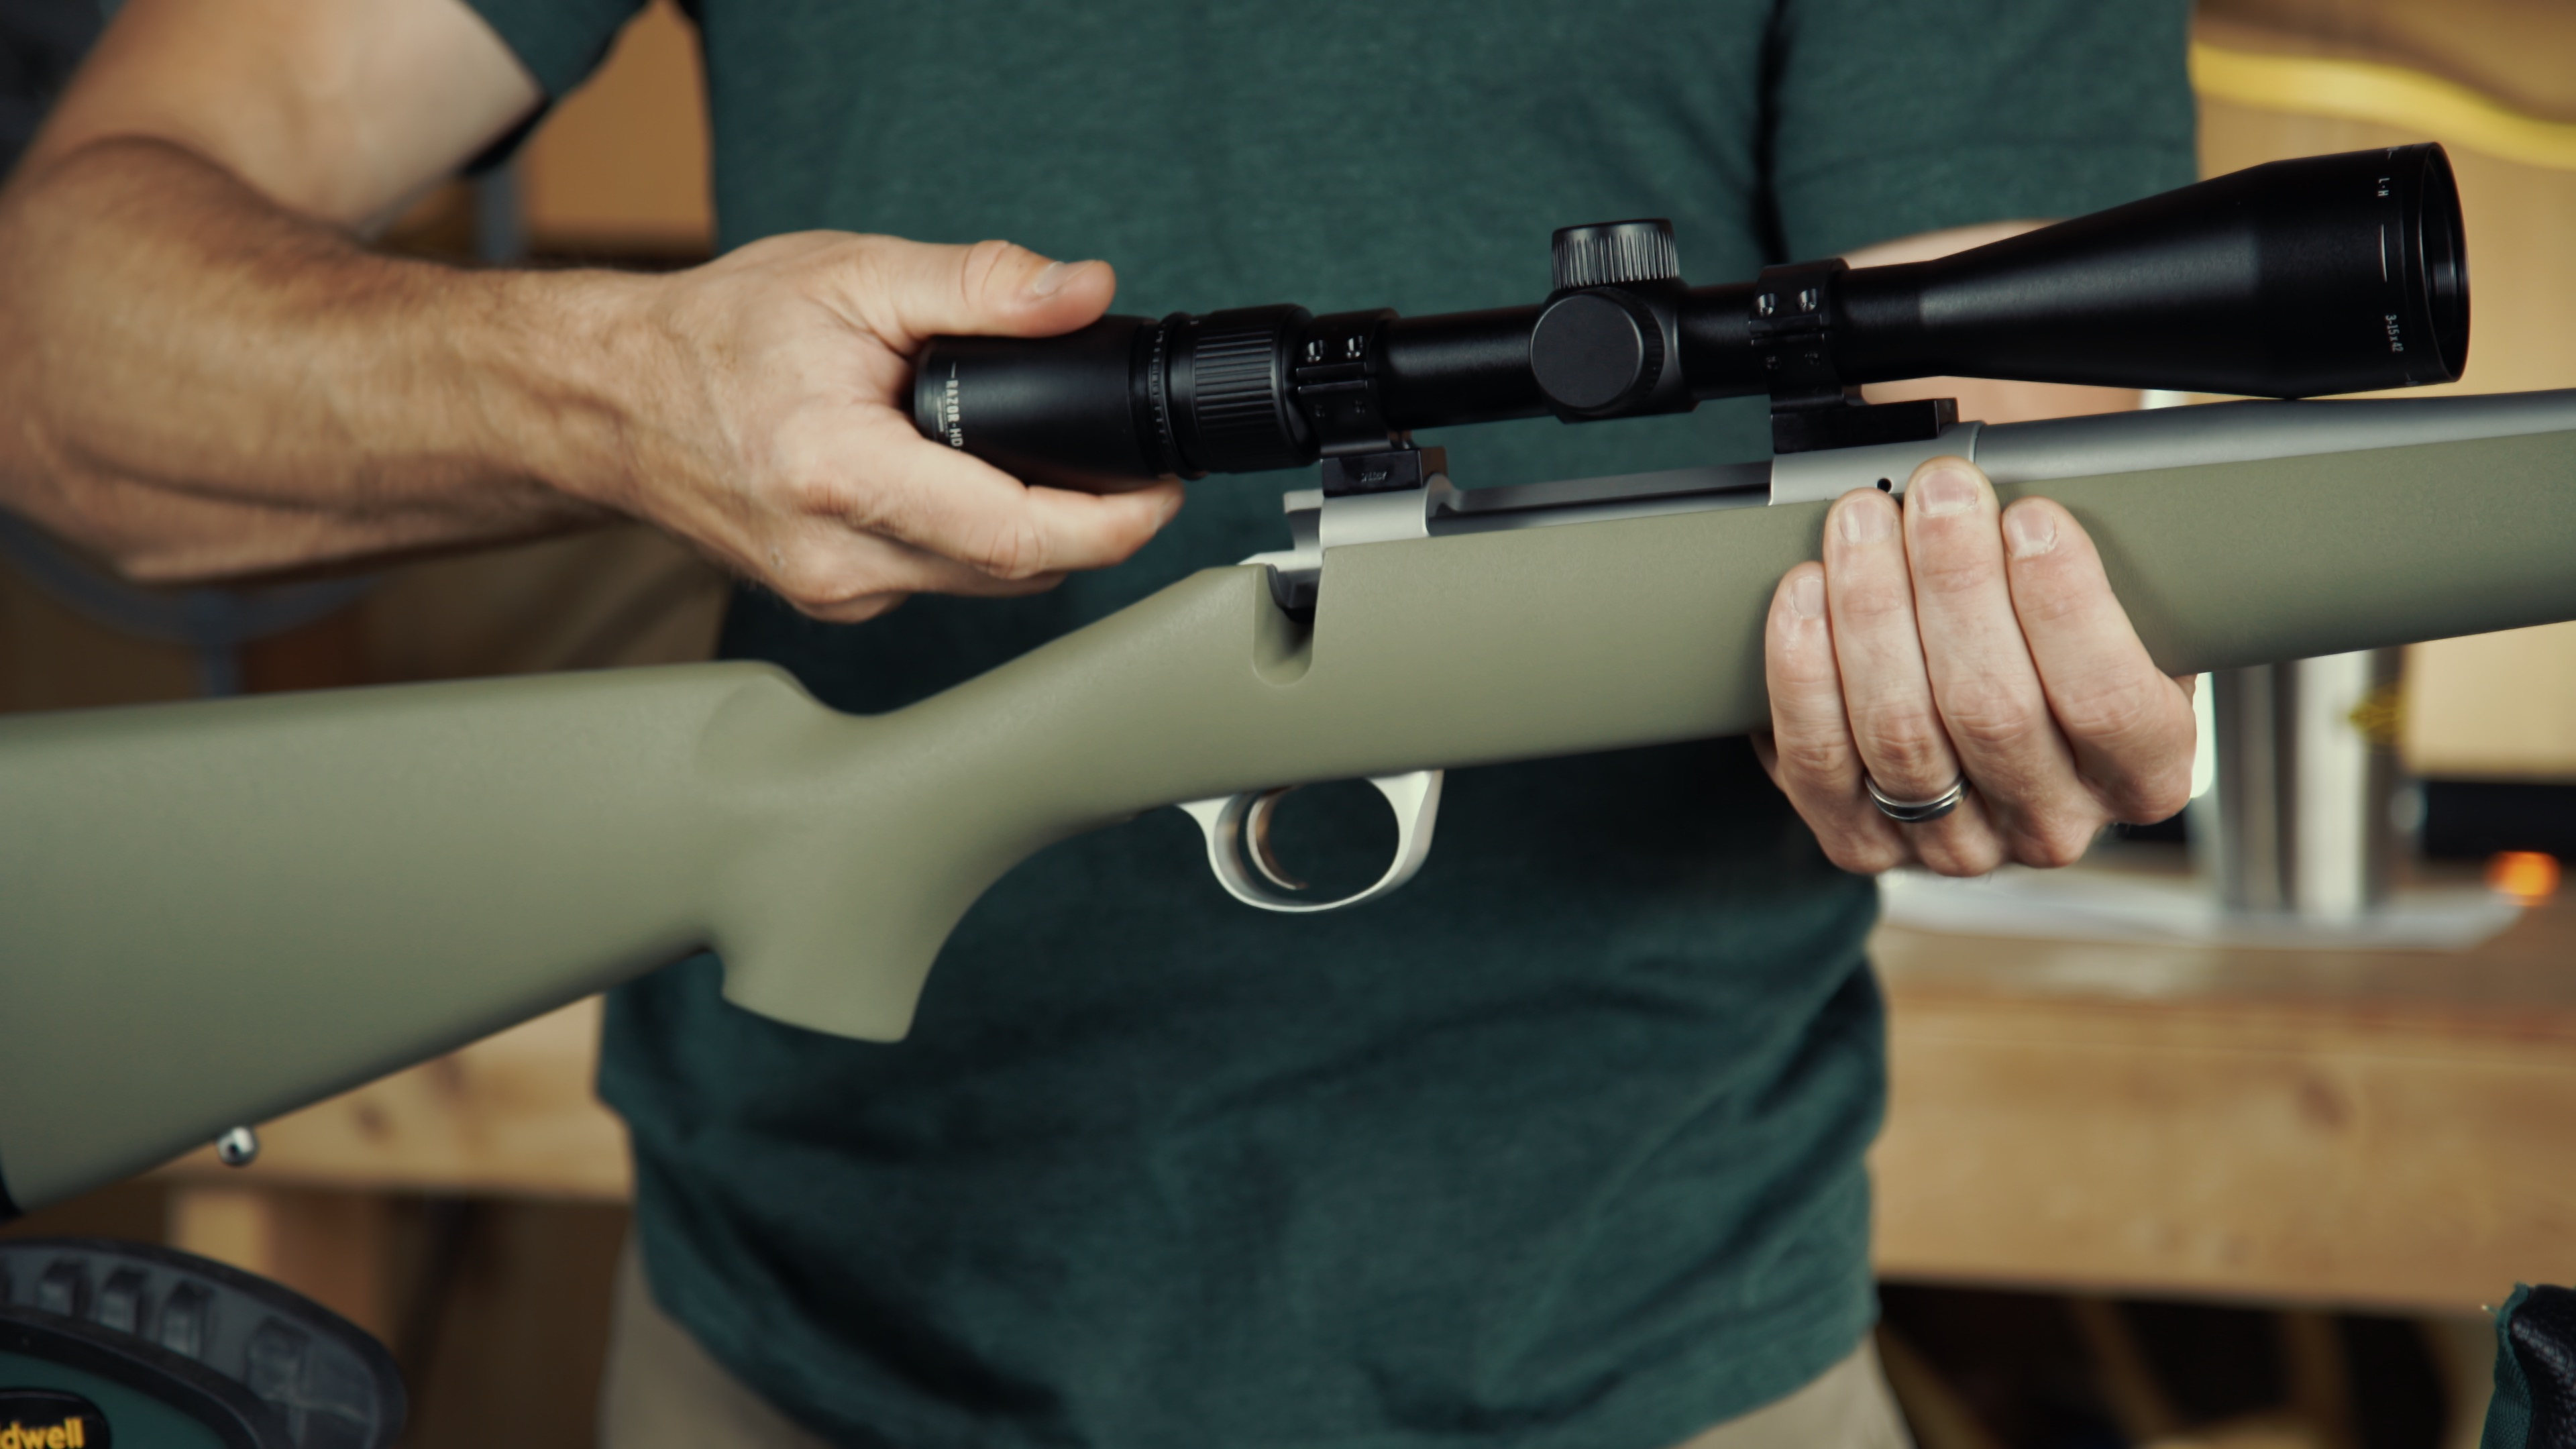
Put your scope in the bottom half of the rings (If you are using a rail/ring setup, mount the bottom half of your rings and torque them to manufacturers specs being sure to place the rings such that you will have space to slide your scope back and forth to adjust for eye relieve).
Place the top half of your rings on the scope and lightly screw in the ring screws. Important: Make sure the screws are loose enough so you can move and rotate your scope with some resistance, keeping in mind you want to have roughly even spacing on either side of your upper and lower rings when full tight.
Slide your scope back and forth and make sure you have nice even feeling contact with your rings.
Adjust your scope for eye relief. Set the scope in the middle of its magnification setting. Carefully remove your rifle from the gun vice and shoulder your rifle like you would when you are shooting. Move the scope all the way forward to the rings. Slowly move the scope back until you can see the entire field of view of the scope. Pay attention to scope "shadow" here. When done properly, you shouldn't have any scope shadow when looking through your scope. When you find the right distance for the scope from your eye, crank up the magnification to ensure the positioning is good at maximum magnification.
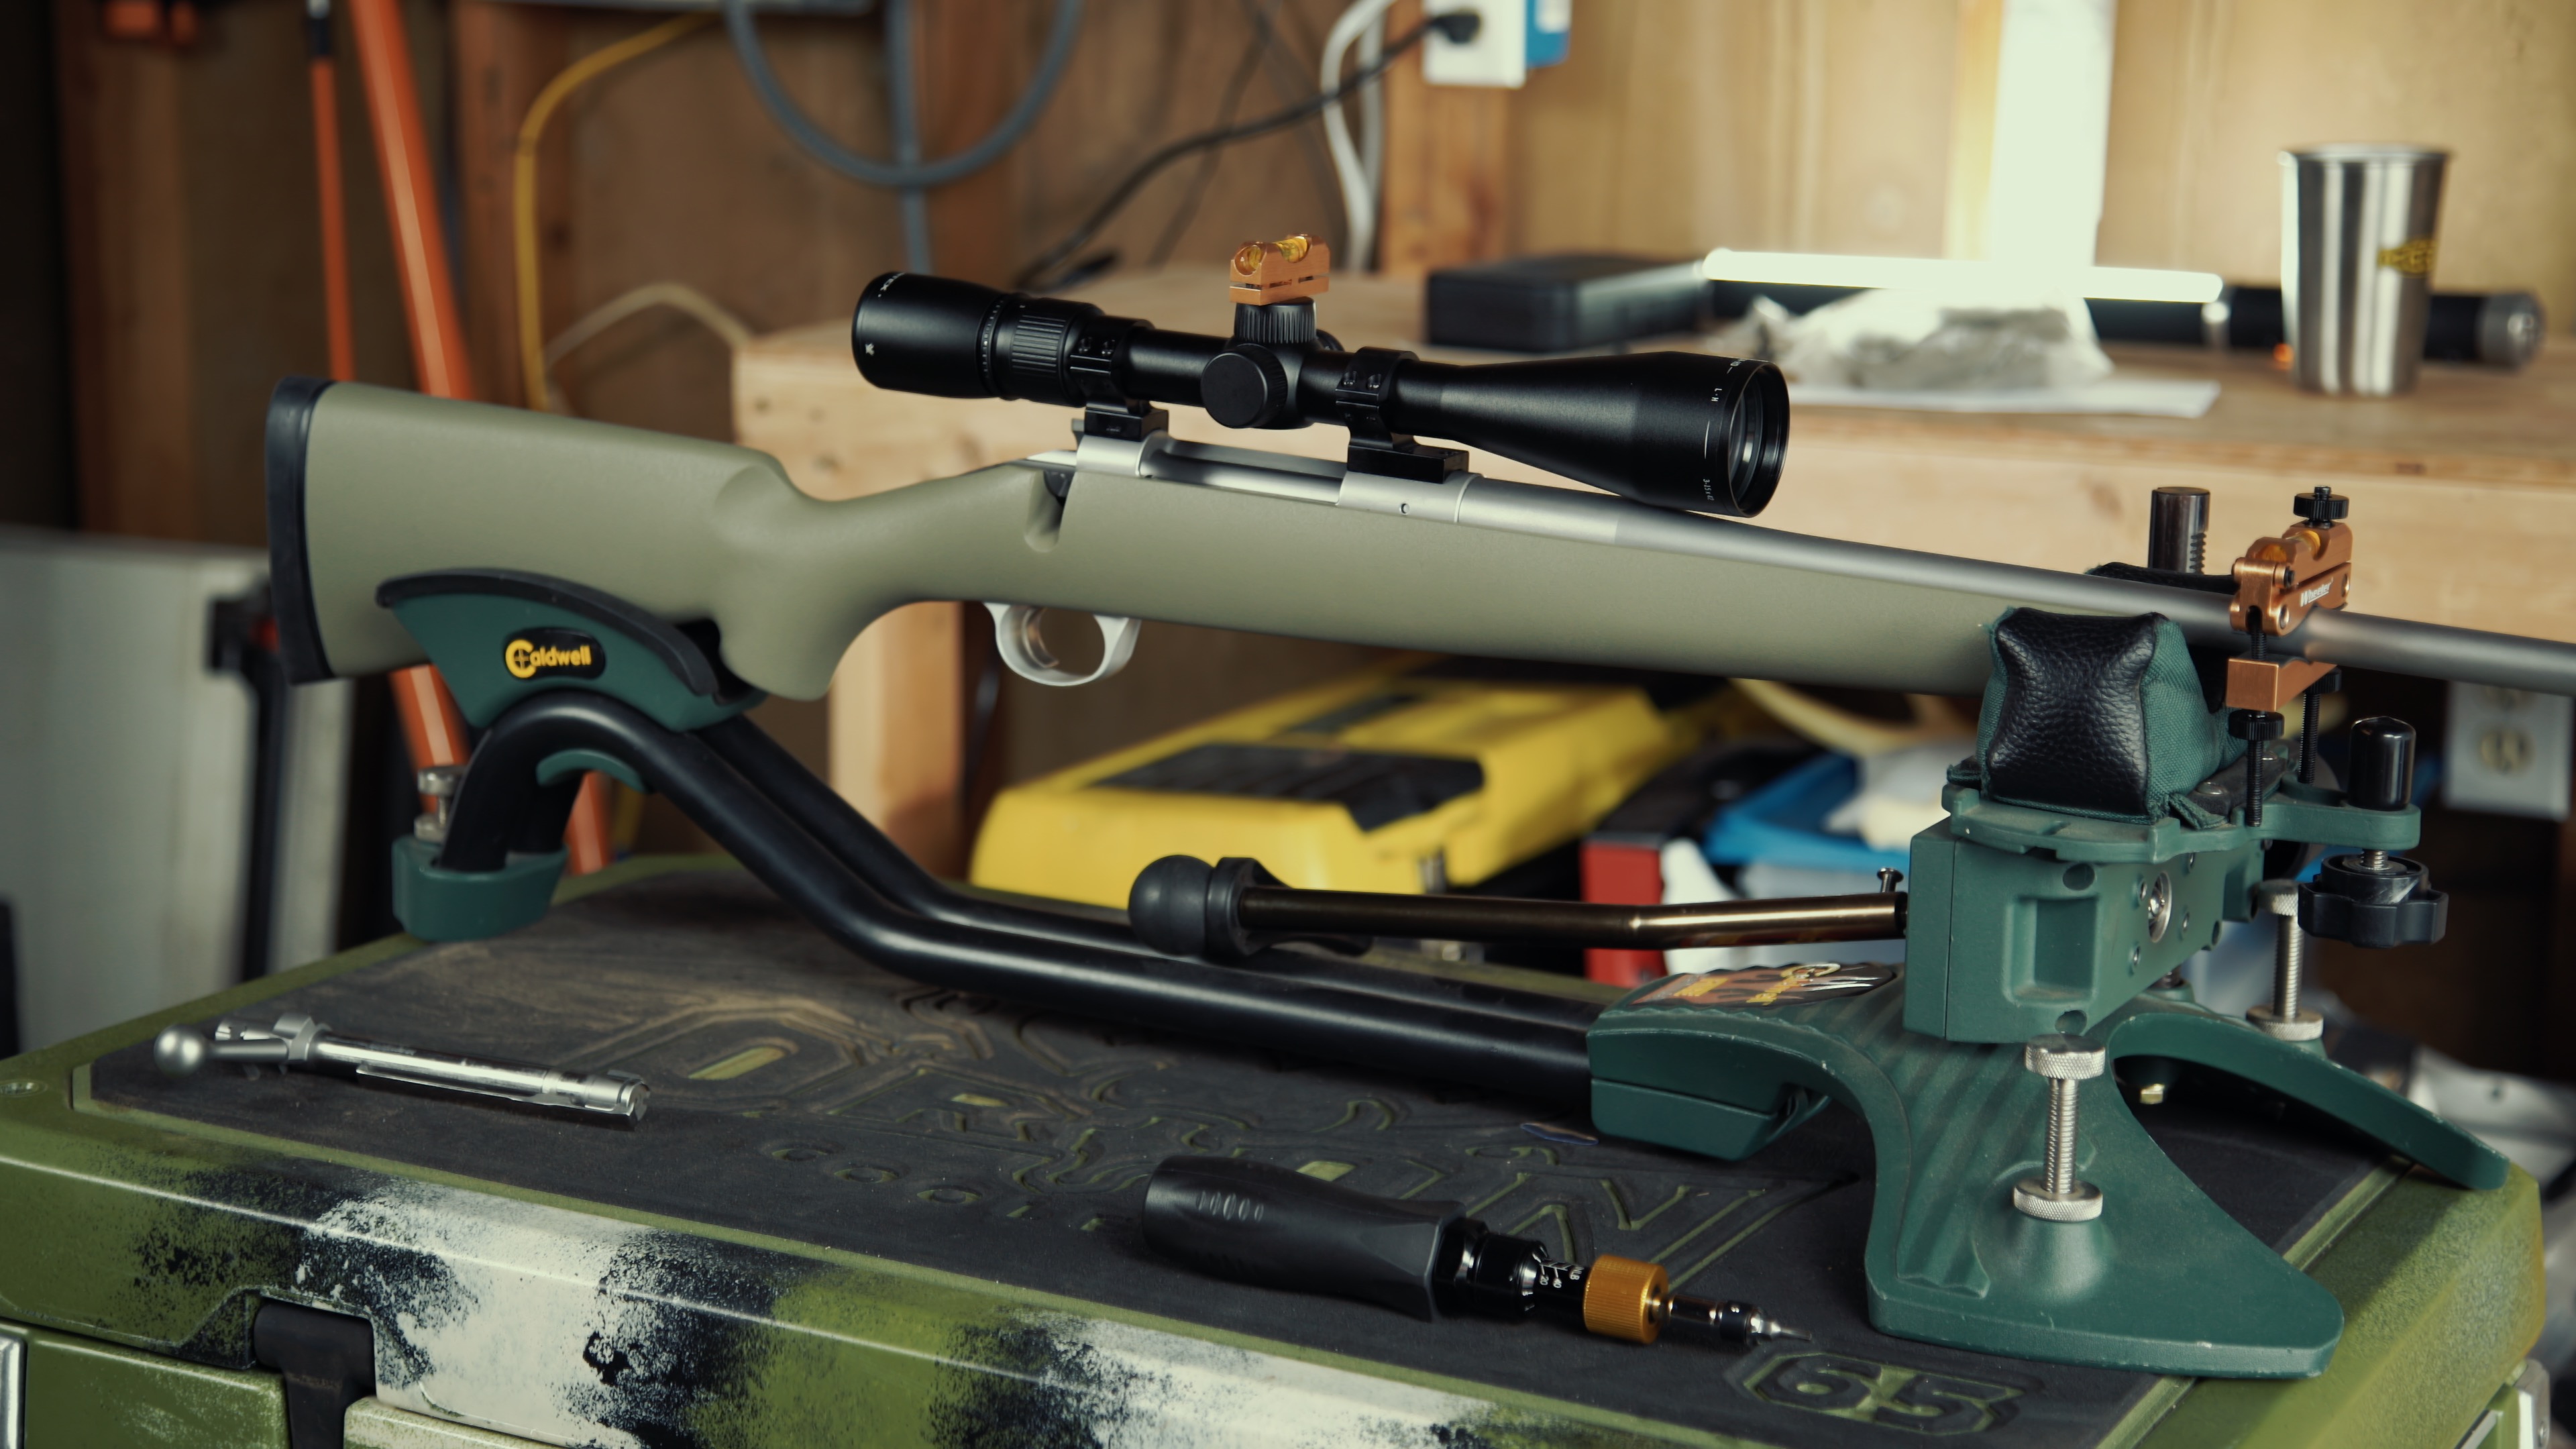
Place your rifle back in your gun vice or whatever you are using to stabilize it, making sure the barrel clamp level is perfectly level.
Place your reference level on the turret of your rifle scope (it is best to remove the turret cap and set it directly on the turret itself), and adjust the scope until the reference level bubble matches the position of the bubble on the barrel clamp level. Important, make sure the reference level is perpendicular to the barrel.
Slowly tighten the ring screws 1/2 a turn at a time, rotating in a zig-zag pattern like you would tightening a car tire. Make sure the spacing between the upper and lower halves of the bases are roughly equal as you tighten the screws. Keep an eye on the reference level as you tighten the screws as it will move as you tighten them down, hence the 1/2 turn per screw guideline. Important-DO NOT over tighten your ring screws. This can cause problems with your scope performance. Use your manufacturers recommended inch/pound torque specs.
Double and triple check your index level and your reference level on your scope. If they don't match up, you'll need to unscrew your ring screws and adjust.
Double check to make sure the gap in your scope rings is roughly the same on both rings and on both sides of your scope.
Important-Do not use Loctite of any kind on your ring screws. Using Loctite makes the screw threads "wet", which can cause over-tightening even with a torque wrench. For example, if you have your wrench set to 18 in/lbs, with wet threads you may be torquing your screws at a much higher pressure. You can use Loctite on any other screws if you want, but not for ring screws.
Other Leveling Options
Using your rail to set your index level: If you use a rail of some type, there are some levels that are made to sit underneath your scope and on top of the rail. With a level on your rail, you adjust your gun until the bubble on the level is perfectly centered. Then, place a second level on your turret cap and adjust your scope so the level on the turret cap matches the level on your rail. This setup is slick and easy, but requires you use a rail.
Using the action of your rifle to set your rifle index: This system works just like the one above, except it allows you to use the action of your rifle to set your index level. I never felt confident that the level in my action was actually level, and didn't think it was as accurate as other methods.
Step #5 Adjust the Reticle Focus
Once you have your scope mounted properly, it is important to adjust the reticle focus if you scope has one. Your reticle focus impacts how crisp the reticle image appears when you look through your scope.
The reticle focus adjustment for different manufacturers will vary. Find your adjustment and mount your rifle like you would if you were shooting and point your scope at a blank wall (preferably a light colored wall). With your eyes closed and the gun in shooting position, open your eyes and pay attention to how the reticle looks immediately. Your eye will try to compensate quickly, so if it isn't crisp right when you open your eye, adjust the reticle focus in or out and start the process over again until the reticle is looks to be a crisp image when you open your eye. This will take a few minutes of playing around, but once done will make looking through the scope crystal clear.
Concluding Thoughts
Once you mount a few scopes, you will get the hang of it and realize how quick and easy it is. If you have other tips and tricks to mounting rifle scopes, be sure to leave them in the comments below.